
How to Install the Cemimax DL59 floor leveller as a polished floor overlay finish?
- Imperial Flooring Australia

- Jul 29, 2025
- 5 min read
Updated: Dec 5, 2025
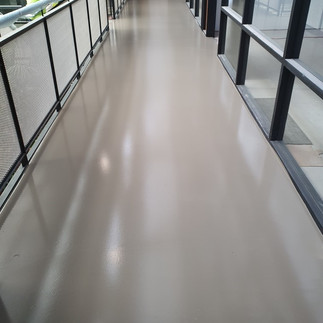
When it comes to creating a durable, sleek, and beautiful floor, the choice of materials and techniques can truly transform a space. One standout option in the world of flooring is the Cemimax DL59 floor leveller. This guide will walk you through installing the Cemimax DL59 as a polished overlay floor finish, ensuring you achieve the best results possible.
Understanding Cement-Based Floor Levellers
Before diving into the installation process, it’s crucial to know what a cement-based floor leveller is and why it’s a preferred choice for many homeowners and contractors.
Cement-based levellers are designed to create a smooth and flat surface suitable for various finishes, including engineered timber, hybrid, carpet, tiles, vinyl, or as a polished overlay. The Cemimax DL59 is particularly praised for its excellent flow properties and quick drying time. In fact, it can set to a workable firmness in as little as two hours, providing a strong base that can support polishing. This feature makes it an ideal choice for modern spaces, even those with high foot traffic.
Tools and Materials You Will Need
To ensure a successful installation of your Cemimax DL59 floor leveller, gather the following essential tools and materials:
Cemimax DL59 floor leveller: Available in 20kg bags. One bag can typically cover around 12m2 @ 1mm Thickness
Laser Level & Straight Edge: Survey the subfloor first Crucial Element
Drill and mixing paddle: For efficient mixing. Use a hippo for larger pours.
Trowel: For spreading the leveller.
Floor primer: Important for adhesion.
Leveling gauge: To ensure a flat surface.
Spike Roller: To ensure no air is left in the compound and released once poured.
Safety gear: Gloves, mask, and goggles are essential for protection.
Spike Shoes: Designed to allow you to walk freely with work boots over wet materials without disturbing the surface
Suitable Sealer: Visit a local hardware store or concrete resurfacing supply store to discuss suitable options.
Concrete grinder: For the final polishing step.
Having the right tools will streamline the process and help you achieve a flawless finish with minimal hassle.
Preparing Your Subfloor
Proper preparation of your subfloor is one of the most critical steps in the levelling process. An effective preparation ensures that the leveller adheres correctly and achieves its intended thickness.
Clean the Surface: Remove all debris, dust, and old adhesives from the subfloor. Use a vacuum cleaner to reach tight corners and ensure complete cleanliness.
Check for Moisture: Make sure your subfloor is dry. High moisture levels can lead to adhesion failure. Utilize a moisture meter amd apply a membrane or moisutre barier prior to Install.
Apply a floor Primer: Depending on the type of subfloor—be it concrete or wood—you'll need to apply a suitable primer. This enhances the bond between the leveller and the subfloor, so skipping this step can lead to complications later. Our DP70 floor primer is universal, an application for all types of subfloors.
Mixing the Cemimax DL59 Floor Leveller
Next, it’s time to prepare your Cemimax DL59 leveller according to the manufacturer’s instructions.
Measure the compound and Water: Accurate ratios are key for achieving the right consistency and performance. Generally, for every 20 kg of Cemimax DL59, mix with around 4 to 4.5 litres of water. For finished floors, the water ratio to bag ratio **MUST BE INSTALLED** consistent, if you apply 4.1 litres of water per bag, ensure all mixes are exactly the same for a consistent finish. Failure to do so, may result in discolouration to the floor finish.
Mix Thoroughly: Using your drill and mixing paddle, blend the mixture until it is smooth and free of lumps, general rule of thumb 3minutes per mix. A consistent mix is critical for uniform application. For larger pours, we recommend a hippo, hire one from kennards hire if you dont have one. https://www.kennards.com.au/for-hire/concrete/mixing-pumping-spraying/mixing-system-epoxy
Applying the Cemimax DL59
Once your mixture is ready, it's time to apply the leveller:
Pouring: For finished floors, full flood pours are required, we recommend a minimum 10mm full flood, ensure you check your low and high spots first... Survey the subfloor in 1m2 grid format with a laser and straight edge, Install packers or heights as gauge to work with when pouring. Start pouring the Cemimax DL59 mix onto the prepared subfloor in a corner of the room and work your way towards the exit. This approach prevents you from overworking a section that is starting to set. Angles can be used to seperate rooms or areas to install in stage pours, not all in one go. Depending on the temperature, rule of thumb is to not touch the compound once poured from the 15-20min mark, it is starting to set!.
Spreading: Use a trowel to evenly spread the leveller across the floor. Make sure it fills any low spots and covers the entire area uniformly for a smooth base.
Check Levelness: Regularly check for levelness using a leveling gauge or pre set your subfloor with heights. Aim for a perfectly flat surface, which is essential for a polished finish.
Allowing for Drying Time
After applying, it's essential to allow your Cemimax DL59 to cure properly:
Curing Duration: The leveller typically takes a few hours to dry initially. However, follow the manufacturer's recommendations for total curing time, which can extend to 28 days for full strength.
Prevent Disruption: Avoid placing any heavy objects on the surface during the curing period to prevent imperfections. Maintain consistent temperature and humidity levels for optimal results.
Polishing the Surface
Once the Cemimax DL59 has fully cured, you can begin polishing: *** Approx 24 to 48hrs after the pour, being site specific to the set time, use common sense on the application being ready to cut and polish.
Using a Concrete Grinder: Utilise a concrete grinder to achieve your desired shine and smoothness. Start with coarse grit discs and gradually move to finer grits for a professional finish. We recommend doing samples first before the intial pour
Cleaning Up: Post-polishing, clean the area thoroughly to remove any dust or debris that might mar the final appearance.
Inspecting the Finish: Take the time to thoroughly inspect the polished surface. Check for any imperfections and address them as needed for an immaculate look.

Colour Oxides
You can indeed mix color oxides into the Cemimax DL59 compound. These oxides are available from specialty concrete supply stores (We do not stock them), and are availablie in in either powder or liquid form.
Guidelines:
When adding powder oxides, increase the water ratio in the mix.
When adding liquid oxides, decrease the water ratio in the mix.
Since the product is custom, it is necessary to conduct in-house tests for ratios before the initial pour. Begin with 10% oxides and adjust as needed to achieve the desired results.
Final Touches and Maintenance
Once your floor is polished, complete these important steps:
Sealing: Depending on your needs and the expected level of use, Apply a sealant to guard against stains and scratches or provide non - slip propertiers. A quality sealant can extend the life of your floor, talk to you local concrete resurfacer supply store or local hardware chain. The cemimax DL59 is suitable for all applications of sealers or epoxy coatings.
Cleaning Routine: To maintain your polished surface, develop a regular cleaning routine. Use products specifically designed for polished concrete to preserve its shine.
The Path to a Stunning polished floor overlay finish
Installing the Cemimax DL59 floor leveller as a polished overlay finish can greatly enhance the look and functionality of your space. Following this guide arms you with the knowledge to tackle the process successfully. Whether you're working on a new construction project or a renovation, this flooring solution offers unmatched versatility and durability. With the right preparation, tools, and methods, you can achieve a stunning polished floor that will impress for years to come.
This article was written by Nick Lopez, The Director of Imperial Flooring Australia


Comments